I've been wanting to make sauerkraut for the longest time, but just couldn't wrap my brain around how to do it! Everyone said, "it's so easy," yet no one could give me specific enough instructions to satisfy me....
Finally, my friend JoAnn went to a class, came home with detailed instructions, and filled me in on everything I needed to know to make my very own batch of sauerkraut, with organic cabbage, nonetheless!! :) Thank you, JoAnn!!!
It is sooo easy, once you know what you are doing!!
So, here's the recipe!
source: adapted from Lancaster County Osteopathic & Integrative Health
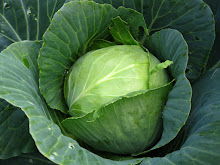
1 head green cabbage
1-1/2 T. sea salt
2-quart mason jar (if you have, otherwise, two 1-quart jars will do)
~~~
Wash cabbage and remove any wilted outer leaves. Be sure to save an outer leaf for later.
Quarter the cabbage, remove core, and slice into thin strips by hand or with food processor.
Place sliced cabbage into a large bowl, and sprinkle the sea salt over top.
Allow to sit for 15 minutes or so, and then start mashing/kneading/pressing/crushing the cabbage.
The goal is to get the juices flowing. (I used my great Aunt's wooden tamper - so special!!)
Mash and knead the cabbage for about 8-10 minutes. Hopefully by the end of this process you will have a lovely pool of salty cabbage juice sitting at the bottom of your bowl.
Begin placing the cabbage into your jar and thoroughly pack down with a wooden spoon or mallet. The goal is to eliminate as many air bubbles as possible.
Repeat the packing and mashing until the jar is full, leaving 2" headspace at top. (This is important - otherwise your brine will overflow - ask me how I know!)
Cover the shredded cabbage with a portion of the reserved leaf, wedging it under the shoulder of the jar.
If your cabbage released enough liquid, your packed cabbage will now be covered with its own brine. If not, you simply need to make a 2% brine solution to cover the cabbage (see below). This is important - if you don't completely submerge the cabbage in brine, it will get moldy.
To make 2% Brine:
Dissolve 1 T. fine sea salt in 4 c. non-chlorinated water. If you don't use all of the brine, it will keep indefinitely in the refrigerator.
Cover the exposed cabbage with the brine, leaving 2" headspace at the top. If you are having trouble with the cabbage floating to the top, you can weigh it down with a glass weight or even wedge a piece of the cabbage core on top to hold it down. Any cabbage that is exposed will need to be thrown away, but if you were going to toss the core anyway, it's no loss.
Add lid to jar and finger tighten. Set aside in a room-temperature location out of direct sunlight for at least one week.
Place a small dish or tray under the jar as it will likely bubble up and overflow. After a day or so, remove the lid to "burp" the jar and release any pent-up gasses, then replace the lid again.
(I found this part of the process incredibly fascinating - there were lots of bubbles rising to the surface, and you could tell something very good was happening!!)
Taste and smell your sauerkraut after a week. If it's tangy enough, move it to the refrigerator for storage. If you like more tang, simply allow it to ferment a bit longer.
(This is the part I still haven't figured out - I'm still not sure exactly what it should taste like! If you've had the luxury of tasting someone's homemade sauerkraut, then you know what flavor you are aiming for!)
And that's all there is to it!!
:)
Note: It takes nearly the same amount of effort to make a large batch of sauerkraut as it does to make a small batch, so go ahead, take the plunge, and make a big batch!!


