Wednesday, August 4, 2021

Loraine's Crock Dill Pickles (Lacto-Fermented "Kosher" Dill Pickles)


I'm kinda obsessed with these pickles....  To think that I can pull every.single.ingredient from my garden (except the salt), stick it in a mason jar and let it sit on the counter at room temp for a few weeks to do its thing, and then end up with a flavor unlike anything you can find on the grocery store shelf, AND get the benefit of naturally occurring probiotics - pretty doggone amazing!!!

Source: adapted from Loraine Johnson's grandfather's recipe

Per one-quart batch (I usually use 2-qt mason jars):

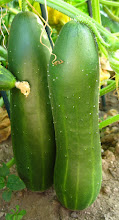
Enough fresh cucumbers (4-6" long) to fill jar, blossom end cut off (this is important, but I forget why!)
2 cloves garlic
1 t. pickling spice
1 fresh head of dill
1 grape leaf (for crispness)

Make a brine by dissolving 1-1/2 T. sea salt in 2 c. chlorine-free water. 
Pack cucumbers in jar.
Add garlic, pickling spice, and dill.
Cover with grape leaf.
Place a pickling pebble* on top of leaf to weight down grape leaf.
Pour brine into jar, leaving at least 1" of headspace.
Cover with canning jar lid, but don't screw on band.
Let sit at room temperature for 2-3 weeks. 
 
I usually check after two weeks.  If you prefer a more sour taste, then let them ferment a little longer.
You'll need to skim mold and scum off the top every few days or so, but don't let that wig you out!
After pickles have reached the desired flavor, simply store in the refrigerator for up to a few months.
Do NOT can these pickles to preserve them - you don't want to destroy the probiotics!

*In place of the pickling pebble, you can fill a small plastic bag with water and use it to weight down the grape leaf.


Tuesday, September 29, 2020

Elma's Grape Jam


source: Elma Umholtz's mother. :)

Oh my, there are no words....  Pairs perfectly with Brie!

4 c. grapes
4 c. sugar
3 T. water

Boil 30 minutes in large pot.
Run through food mill.
Process 10 minutes.

Yield:  approximately 3 c.


Friday, July 10, 2020

Sheet Pan Roasted Sausage and Squash

Photo credit: Diary of A Recipe Collector

Source: adapted from diaryofarecipecollector.com

Yum!!!
2 yellow squash, sliced in 1/2 moons 1/4" thick
1/2 lb. sausage links, cut into chunks
1 small onion, sliced
2 cloves garlic, chopped
2 t. fresh oregano, minced
1 t. sea salt
1/2 t.  black pepper
olive oil

Preheat oven to 400 degrees.
Place all ingredients except olive oil in large bowl.
Drizzle with oil and toss to coat evenly.
Place on sheet pan.
Roast for 25-30 minutes, or until sausage is browned and vegetables are tender.


Thursday, June 11, 2020

Lemon Roasted Asparagus


source: adapted from The Pioneer Woman Magazine

2 lemons
1 t. sea salt
3 pounds asparagus, trimmed
olive oil or melted lard, for drizzling
1 c. fresh parsley, chopped

Grate the zest of the lemons.  Spread out the zest on a plate and let it air-dry slightly, about 30 minutes.

Preheat oven to 450 degrees.  Mix the lemon zest with the salt in a small bowl and set aside.  Cut the lemons in half and set aside.

Divide the asparagus between two baking sheets; drizzle with olive oil (or melted lard) and toss to coat.  Roast until the asparagus is tender and starting to color, about 8-10 minutes.  Transfer asparagus to a platter.

Before serving, squeeze the lemons over the asparagus, drizzle with olive oil and sprinkle with the lemon salt and parsley.

Yum!!!!

Saturday, March 21, 2020

Bone Broth 101


Bone broth - it's all the rage these days!  Why??  
Well, with all the recent focus on gut health and autoimmune disorders, bone broth has come into the spotlight and is credited for healing and sealing gut permeability.   It's also great for your skin, hair and nails.  When bones are simmered all day, collagen and minerals are pulled from the bones, resulting in an amazing tonic. 

I had been motivated to learn how to make bone broth because of my own autoimmune issues, but also because it just feels right; there's something satisfying about respecting every part of the animal and not tossing their precious bones.  And, nothing on a grocery store shelf will compare!

First of all, what is bone broth?  Is it the same as stock or broth?  Nope!  

Here's the scoop:

Broth is made by simmering meaty bones (or just meat!), plus onions, carrots and celery for under two hours.  It is typically seasoned with salt, pepper, and other spices.

Stock is made with bones that have a small amount of meat scraps on them along with onions, carrots, and celery for two to six hours.  It is left unseasoned, and it doesn't gel because it hasn't been simmered long enough.

Bone broth is defined by its thickness and long cooking time.  No seasoning is added.  I don't like to add any vegetables because I think it makes it bitter, even though many recommending doing so.  Bones are simmered for anywhere from 12-72 hours, resulting in lots of collagen-rich gelatin in the broth.  Collagen is a protein that is great for your skin, hair, and nails, and promotes a healthy gut.  You'll know that you got it right if it cools into a jello-O consistency when you put it in the refrigerator!

How To:

First of all, there's no sense in going to all the work of making bone broth with just any old bones.  I'm fortunate to have a farm near me that sells pastured chicken and beef bones.  I purchase lamb and pork/ham bones from Rooster Street Butcher in Lititz.  Search out a good source of bones from animals that were pastured and not fed any GMO feed.

There's so much info about making bone broth on line, and it can be kind of confusing.  I read everything I could find, studied a chapter on stock in the Nourishing Traditions cookbook, and chatted with Tony at Rooster Street Butcher.  I experimented with a number of different methods, and finally came up with the following way of going about it:


But first, please consider adding one magic ingredient:  chicken feet!!
I know, it's the creepiest thing, and you probably won't want to tell too many people that the yummy soup you made from your precious broth was made with chicken feet, but it will result in a luscious collagen-rich broth.   Trust me, it's worth it, even though I always feel like a witch stirring her cauldron.... 

Roasted Chicken Bone Broth

Ever since I switched to eating pastured chicken, I found it's cheapest to purchase a whole bird vs. cut up pieces.  Talk about an adjustment from years of cooking with boneless, skinless breasts! But, I am super happy with my roast chicken, now.  After roasting, I usually eat the wings, legs and thighs, and then chop or shred the breast meat and freeze it for later.  I toss the carcass and bones in the freezer, and when I have accumulated enough bones, I make a batch of chicken bone broth.

Weigh chicken bones and place in a large stock pot.
Add one gallon of water per 2 lbs of bones.
Add 2 chicken feet per gallon of water.
Bring to a boil and skim off any scum.
Reduce heat, cover and simmer all day.
When finished cooking, remove the bones with tongs or a slotted spoon and strain broth through a sieve into a large bowl or another stock pot.
Ladle broth into wide mouth pint jars.
Chill overnight.
In the morning, skim fat off the top of each jar and freeze.


Chicken Bone Broth

Roasted chicken broth has a slightly stronger flavor than broth made from uncooked bones, so I usually like to have some of this milder flavored chicken bone broth on hand as well.  Necks, backs, and wings are all great for broth, and will be your cheapest option; you can always use a whole chicken too, but that gets pricey.  I also use leftover chicken carcasses from making soup.  There's no need to add any seasonings at this point; you just want the true chicken flavor.  
Follow the same instructions above for Roasted Chicken Broth.


Beef, Pork, or Lamb Stock

Stock made from these animal bones has kind of a funky flavor if you don't roast them first.  Also, it's helpful to add vinegar and let them soak before simmering to help leach the minerals out of the bones,  (For whatever reason, I usually skip the vinegar step when making chicken bone broth, but maybe I need to rethink that.)  Ask for bones from your butcher - he'll know what you need.  I usually don't use marrow bones, but some people do.

After weighing your bones, place them on a rimmed cookie sheet and roast for 30-60 minutes at 350 degrees.
Then, place bones in a large stockpot.
Add 1 gallon water per 2 lbs. of bones
Add 2 T. vinegar per gallon of water, and soak for 30 minutes.
Then add:
2 chicken feet,  per gallon of water
1 t. peppercorns per gallon of water
1 bay leaf per gallon of water
Bring to a boil and skim off any scum that rises to the surface.
Reduce heat, cover and simmer all day.
When finished cooking, remove the bones with tongs or a slotted spoon and strain broth through a  sieve into a large bowl or stock pot.
Ladle into wide mouth pint jars.
Chill overnight.
In the morning, skim fat off the top of each jar and freeze.


Additional notes:

Plan to get up early, get it going first thing in the morning, and let it simmer all day.  It's a fun project for a day at home!

 I usually try to make bone broth when the weather is cool.  That way, it's cold enough for me to set the stockpot or the jars in the garage to chill overnight.  I usually make a huge batch while I'm at it and don't have enough refrigerator space for a big stockpot or lots of jars. 

If you ladle broth into jars, it will cool much more quickly than a large pot.  If you are planning to use plastic containers, then you'll want to allow the pot of broth to cool before pouring into the containers.  I have a phobia when it comes to storing food in plastic, especially liquids, so I always use glass.

If freezing, do NOT use quart or pint jars with a neck; the jar will break!  You must use a wide mouth jar with straight sides like these or these.

If you wish to can your broth, you must use a pressure canner, NOT a water bath or steam canner.  If I'm going to can it, I allow the entire pot to cool overnight after I've strained out the bones.  In the morning, I skim the fat off the top, then ladle into pint or quart jars; I don't need to use wide-mouth jars in this case since I'm not freezing it.
I don't enjoy using a pressure canner, but it is nice to have canned stock on hand that doesn't need to be thawed first.

Some people recommend simmering  for up to 72 hours (!!), but that's not practical unless you are using a crockpot, and who has a crockpot that large?!  Also, I think the flavor is much better if you just simmer for one day.  And, for those who have a MSG sensitivity, the resulting broth from a two or three-day simmer may do more harm than good.

If you don't have a good stockpot, consider investing in one; it's well worth it.  After burning way too many batches of spaghetti sauce or applesauce, I finally invested in a heavy stock pot last summer, and it's fabulous!  I got mine at The Restaurant Store in Lancaster. 


Monday, September 9, 2019

Baked Cheesy Zucchini Bites


This is my favorite version so far!

1-1/2 c. packed shredded zucchini
1 large egg, lightly beaten
1/4 to 1/2 c. shredded sharp cheddar cheese, or a blend or cheddar and Monterey jack
1/4 c. bread crumbs
2 t. fresh basil, minced
1 garlic clove, minced
1/4 t. sea salt
1/8 t. pepper

Preheat oven to 425 degrees.  Line a rimmed baking sheet with parchment paper.

Place shredded zucchini in a clean kitchen towel* and wring out all the excess water.

Place zucchini and remaining ingredients in a medium bowl and mix until combined.

Drop mixture by tablespoonfuls onto baking sheet; lightly press mounds to flatten slightly.

Bake for 16-20 minutes until edges are golden.

Yum!!

*Note:  I use a Norwex netted Dish Cloth instead of the towel - it works great!  The shredded zucchini shakes right out!


Tuesday, June 11, 2019

Chicken Fried Rice with Swiss Chard


I first made this recipe with bok choy out of my Misfits Market box and it was divine!  So, I googled "substitute for bok choy" and discovered that Swiss chard is a good substitute since the greens hold up well in sautéing, and the stems are a similar texture.  I definitely prefer the flavor and texture of the bok choy in this recipe (chard has kind of a strong, earthy flavor), but the chard version was still yummy, and I was thrilled to be able to find another use for Swiss chard from my garden!  


2 T. vegetable oil (I used avocado oil)
2 large eggs, lightly beaten
sea salt and ground pepper
1 lb. bok choy, cored and coarsely chopped (or Swiss chard)
1 medium onion, finely chopped
2 garlic cloves, minced
2 c. roasted chicken, shredded
1 T. grated peeled fresh ginger (I didn't have any on hand, so I used ginger powder)
2 T. rice vinegar (I simply used Braggs Apple Cider Vinegar, my fav)
2 T. soy sauce

In large nonstick skillet, heat 1 T. oil over medium heat.  Add eggs; season with salt and pepper; cook until set, 1-3 minutes.  Transfer cooked eggs to cutting board (reserve skillet); let cool.  Roll up, and thinly slice eggs crosswise; set aside.

In skillet, heat remaining 1 T. oil over medium-high heat.  Add bok choy or Swiss chard, onion, and garlic; season with salt and pepper (skillet will be very full).  Cook, stirring frequently, until greens are crisp-tender, 2 to 4 minutes.

Add rice, chicken, sliced eggs, ginger, vinegar, and soy sauce.  Cook, tossing, until heated through, 3 to 5 minutes.

Wednesday, May 29, 2019

Peony Jelly


Again, who would have guessed?!

I am still tweaking this recipe, but this is how I go about it for now.

4 c. peony petals, picked just before they turn brown
5 c. water

Boil petals in water; steep overnight.

Strain water from the petals using a sieve lined with a coffee filter.

Measure out 2-1/4 c. of the infused water, and then follow directions for Lilac Jelly.  (You can discard the remixing infusion, or adjust the recipe to use all of the infused water.)

As I said, I'm still tweaking this recipe, but for now, this yielded good results!


Sunday, May 19, 2019

French Onion Soup


Oooh, first time I tried making this, and it was downright yummy!


4 T. unsalted butter
2 lbs. yellow onions, sliced into 1/4" half circles
1 t. sugar
1 T. all-purpose flour
1/2 c. dry sherry
2 t. chopped fresh thyme or 3/4 t. dried thyme
salt and freshly ground black pepper
1 small French baguette, sliced crosswise in 1/2" pieces
8 oz. Gruyere cheese, grated on the large holes of a box grater (about 3 c.)

 Melt butter in a large Dutch over or heavy pot on medium-low heat.  Add onions.  Spread them out in as thick of a layer as possible.  Sprinkle with sugar, and cook, stirring just as needed to keep onions from sticking, until they are melting and soft, golden brown, and beginning to caramelize, about 1 hour.

Sprinkle flour over onions, and stir to coat.  Add sherry, stock, and thyme, and bring to a simmer.  Cook, partially covered, for about 30 min, to allow the flavors to combine.  Season with salt and pepper to taste.

Meanwhile, lightly toast bread under a boiler; set aside.  Ladle hot soup into six ovenproof bowls.  Arrange the bowls on a baking pan.  Place 1 or 2 slices of toasted bread over each bowl of soup.  Sprinkle 1/2 c. grated cheese over bread in each bowl, and place under the broiler until cheese is melted and crusty brown around the edges.  Watch carefully that bread doesn't burn.  Serve immediately.

Serves 6


Wednesday, May 1, 2019

Lilac Jelly


Who would have even imagined??!!  

I blame my friend Jill....

Jill got me started down this jelly-making trail after she made Violet Jelly from the tiny violets she harvested from her yard.  I made fun of her, but then I got hooked on the idea of looking around the yard and making jelly out of whatever I had on hand!

Craziness, I know, but seriously, how cool!

source:  adapted from commonsensehome.com

2 c. packed lilac blossoms (no leaves, no stems)
2-1/2 c. boiling water
1/4 c. fresh lemon juice
1/2 t. butter
4 c. sugar
one box Sure-Jell powdered pectin

First, infuse blossoms in the boiling water:  place the blossoms in a heat resistant container and pour the boiling water over the blossoms.  Allow them to steep 8 hours or overnight.

When ready to can, sterilize four 8-oz. jars or eight 4-oz jars; keep hot.  Heat lids and rings in hot water; keep warm but not boiling.  Fill water bath canner* and bring to boil.

Strain the flowers out of the water using a sieve lined with a coffee filter.  Squeeze liquid out of the blossoms.  You should have approximately 2-1/4 c. infused water.  Add more water if needed.  

Place the flower infusion, lemon juice, butter, and pectin in a large heavy pot.  Bring to a rolling boil. Add sugar all at once; return to boil.  Boil for one minute, stirring constantly.  Skim foam if needed.  (The butter will help to reduce foaming.)  Remove from heat.

Ladle jelly into sterilized jars leaving 1/4" headspace.  Wipe rims clean and screw on lids.  Process for 10 minutes in water bath canner*.  Remove jars from canner and allow to cool before removing rings.

Yields four 8-oz. jars or eight 4-oz. jars


*Note:  I've been using a steam canner in place of a water bath canner and love it!!


Wednesday, April 17, 2019

Cream of Asparagus Soup


source:  adapted from marthastewart.com

coarse sea salt
freshly ground pepper
2 lbs. asparagus, trimmed and cut into 1" pieces (reserve trimmings and 20 tips)
2 T. olive oil, plus more for drizzling
1/2 large shallot, sliced crosswise, plus 1/2 large shallot
1/2 clove garlic, finely chopped, plus 1/2 clove garlic
1 medium Yukon gold potato (about 8 oz.), peeled and diced (about 1 c.)

Bring 6 c. water to boil in medium saucepan; season with 2 t. sea salt.
Add asparagus tips and blanch until bright green and just tender, about 2-3 minutes.
Transfer to an ice bath with a slotted spoon; reserve for topping.
Add asparagus trimmings, 1/2 shallot and 1/2 glove to same pot and return to boil; reduce heat and simmer 20-25 minutes.

In another saucepan, heat olive oil over medium heat.
Add sliced shallot and chopped garlic and cook until softened, but not browned, about 5 minutes.
Stir in potato and enough asparagus stock to cover vegetables (about 1 c.), and simmer until potato is tender, about 10-12 minutes.
Strain remaining asparagus stock directly into saucepan with potatoes.  Add remaining asparagus and cook until tender and bright green, about 5 minutes.
Remove from heat and let cool slightly.
Puree in blender until completely smooth; remove 1 c. and reserve.
Slowly stir in cream; season to tase with salt and pepper.
Thin with reserved liquid as needed.
Serve hot or chilled, topped with asparagus tips and a drizzle of oil.

Note:  I always make asparagus stock from the woody ends of my asparagus and keep it in the freezer to use anytime a recipe calls for vegetable stock.  This recipe will motivate you to get into that habit!

Monday, April 15, 2019

Whole Roasted Garlic


I got several large, flat bulbs of garlic in my recent Misfit Market box, so they were perfect for roasting!

Source: MarthaStewart.com

2 heads garlic, papery outer skins discarded
2 T. extra-virgin olive oil, plus more for storing

Preheat oven to 425 degrees.
Cut a think (1/4") slice from top of each head of garlic; discard.
Place garlic in a small baking dish and drizzle with olive oil.
Cover with parchment, then foil, and roast until soft and golden, about 1 hour and 15 minutes.

To store, squeeze out unused cloves into jar and add enough olive oil to cover.  Store closed jar in refrigerator for up to one week.


Tuesday, March 26, 2019

Diane B.'s Apple and Carrot Salad

Photo Credit:  Weight Watchers

So surprisingly simple and yummy!!

adapted from Weight Watchers

1 red apple, cut into matchsticks
1 green apple, cut into matchsticks
1-1/2 T. fresh lemon juice
fresh carrots, cut into matchsticks, approx. 3 c.
1/4 c. fresh chives, chopped
1 T. olive oil
1 t. sugar
1/2 t. sea salt
1/4 t. black pepper
2 oz. Feta cheese (French variety recommended)

Place apples in large bowl and toss with lemon juice.  Add remaining ingredients and toss.

Sunday, February 17, 2019

Baked Soybeans


I've been wanting to make a batch of Baked Soybeans for several years now, using soybeans that had dried on the stalk from my garden.  I wasn't sure what to expect, but I have to admit I was impressed! I am sure the addition of Rooster Street Bacon and PA maple syrup helped take it to the next level!  My friend Julia had shared these heirloom seeds with me a number of years ago, and I've been planting them ever since.  I'm so grateful she introduced them to me!

Source:  adapted from Elma's Baked Beans recipe (original recipe from Ruth Musser)

1 lb. dried soybeans, soaked overnight and drained
3/4 c. onion, diced
1 c. ketchup
2/3 c. maple syrup
1 t. salt
1/4 tsp. cayenne pepper
Several strips of bacon, coarsely diced

In a large pot, cover soybeans with water and cook until soft, approximately 2-1/4 hours.  Drain.
In large casserole dish, mix remaining ingredients except bacon.  Add cooked beans and mix well.  Top with bacon.  
Bake uncovered at 325 degrees for 1 hour.


Wednesday, December 5, 2018

Homemade Sauerkraut


I've been wanting to make sauerkraut for the longest time, but just couldn't wrap my brain around how to do it!  Everyone said, "it's so easy," yet no one could give me specific enough instructions to satisfy me....
Finally, my friend JoAnn went to a class, came home with detailed instructions, and filled me in on everything I needed to know to make my very own batch of sauerkraut, with organic cabbage, nonetheless!!  :)  Thank you, JoAnn!!!
It is sooo easy,  once you know what you are doing!!
So, here's the recipe!

source: adapted from Lancaster County Osteopathic & Integrative Health

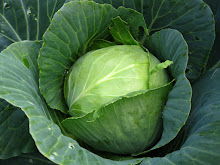
1 head green cabbage
1-1/2 T. sea salt
2-quart mason jar (if you have, otherwise, two 1-quart jars will do)
~~~
Wash cabbage and remove any wilted outer leaves.  Be sure to save an outer leaf for later.

Quarter the cabbage, remove core, and slice into thin strips by hand or with food processor.

Place sliced cabbage into a large bowl, and sprinkle the sea salt over top.

Allow to sit for 15 minutes or so, and then start mashing/kneading/pressing/crushing the cabbage.  
The goal is to get the juices flowing.  (I used my great Aunt's wooden tamper - so special!!)

Mash and knead the cabbage for about 8-10 minutes.  Hopefully by the end of this process you will have a lovely pool of salty cabbage juice sitting at the bottom of your bowl.

Begin placing the cabbage into your jar and thoroughly pack down with a wooden spoon or mallet.  The goal is to eliminate as many air bubbles as possible.

Repeat the packing and mashing until the jar is full, leaving 2" headspace at top.  (This is important - otherwise your brine will overflow - ask me how I know!)
Cover the shredded cabbage with a portion of the reserved leaf, wedging it under the shoulder of the jar.

If your cabbage released enough liquid, your packed cabbage will now be covered with its own brine.  If not, you simply need to make a 2% brine solution to cover the cabbage (see below).  This is important - if you don't completely submerge the cabbage in brine, it will get moldy.


To make 2% Brine:
Dissolve 1 T. fine sea salt in 4 c. non-chlorinated water.  If you don't use all of the brine, it will keep indefinitely in the refrigerator.

Cover the exposed cabbage with the brine, leaving 2" headspace at the top.  If you are having trouble with the cabbage floating to the top, you can weigh it down with a glass weight or even wedge a piece of the cabbage core on top to hold it down.  Any cabbage that is exposed will need to be thrown away, but if you were going to toss the core anyway, it's no loss.

Add lid to jar and finger tighten.  Set aside in a room-temperature location out of direct sunlight for at least one week.

Place a small dish or tray under the jar as it will likely bubble up and overflow.  After a day or so, remove the lid to "burp" the jar and release any pent-up gasses, then replace the lid again.
(I found this part of the process incredibly fascinating - there were lots of bubbles rising to the surface, and you could tell something very good was happening!!)

Taste and smell your sauerkraut after a week.  If it's tangy enough, move it to the refrigerator for storage.  If you like more tang, simply allow it to ferment a bit longer.
(This is the part I still haven't figured out - I'm still not sure exactly what it should taste like!  If you've had the luxury of tasting someone's homemade sauerkraut, then you know what flavor you are aiming for!)

And that's all there is to it!!
:)

Note:  It takes nearly the same amount of effort to make a large batch of sauerkraut as it does to make a small batch, so go ahead, take the plunge, and make a big batch!!