Friday, December 17, 2010

Roasted Red Pepper Hummus

I love this hummus recipe!  The mayo adds creaminess and gives it a bit of a different twist; it's a nice recipe to use if you're not sure your folks are hummus lovers.  I made it for our Christmas luncheon at work today, and got good feedback.  :)
I have a stash of roasted red peppers from this summer in the freezer; I froze them in 1/4 c. quantities, so it's easy to pull them out for this recipe.

Source: adapted from Kristy Y.'s mother- in-law/Taste of Home Magazine

1/3 c. mayonnaise*
1 T. fresh lime juice**
1 can garbanzo beans, drained and rinsed
1/4 c. roasted red peppers, chopped
2 garlic cloves, minced
1/2 t. chili powder
1/4 t. cumin
1 t. sea salt

Blend above ingredients in food processor until smooth.

Notes:
*I sometimes substitute olive oil for the mayo.  The texture won't be quite as creamy, but the flavor is still good.
** I often don't have a fresh lime on hand for this recipe, so I use fresh lemon juice instead.

Thursday, December 16, 2010

Wild-Rice Stuffed Acorn Squash


Oooh, this was downright yummy!  I tried it the other evening, but didn't have wild rice on hand so I substituted quinoa instead.  It was OK, but much better with the rice - the chewy rice complements the soft texture of the roasted squash.  The wild rice blend adds more color, too (although I still don't understand why it's so expensive!).  And, the caramelized edges of the squash is pretty!  I still have some dried cherries on hand from last summer (compliments of my friend Elma's sour cherry tree!), and the garlic was grown in Silver Spring, so this truly is a local dish.  :)

Source:  adapted from Everyday Food, November 2006

Note:  the recipe is for one acorn squash - multiply as needed.

1 acorn squash (1 1/2 lb.), halved lengthwise, seeds removed*
1 T. butter
1 small onion, minced
1 garlic clove, minced
1/4 t. dried sage
sea salt
pepper
1/2 c. wild and brown rice blend
7/8 c. water
1/4 c. dried cherries
1/4 c. pecans, chopped

Preheat oven to 450 degrees.  Oil cut edges of squash with olive oil.  On a rimmed baking sheet, arrange squash, cut side down.  Roast until tender when pierced with the tip of a paring knife, about 30-40 minutes.


 Meanwhile, in a large saucepan, heat butter over medium heat.  Add onion, garlic and sage.  Season with salt and pepper.  Cook, stirring occasionally, until tender, 3-5 minutes.  Add rice and water; bring to a boil, cover and reduce heat to low.  Cook until tender, without stirring, about 35-40 minutes.

Remove rice from heat; stir in cherries and pecans.  Season with salt and pepper.  Season inside of each squash half with salt and pepper.  Mound rice mixture into squash halves and serve.

Serves 2

*Note: Use a long serrated knife to easily halve the acorn squash neatly.
And, don't forget to roast the squash seeds! Here's the link.

Update, 12/25/10:
I served the rice mixture as a pilaf for Christmas dinner today.  I was a bit frazzled and didn't read the recipe correctly - I missed adding some of the seasonings, but it was still good!

Roasted Acorn Squash Seeds


I like these even better than pumpkin seeds - they're a little more delicate.

Here's the link to the recipe I posted earlier this fall:


Tuesday, December 14, 2010

Braised Cabbage with Spicy Croutons


This is a nice, fairly easy way to prepare cabbage, and it has a lovely presentation (if you don't burn it like I did!).  Click on the Better Homes & Gardens link below to be inspired by their picture:

Source:  adapted from Better Homes and Gardens magazine, December 2010

2 T. olive oil
1 T. butter
2 c. hearty bread, torn into coarse croutons
1 clove fresh garlic, minced
1/4 t. crushed red pepper
1 small head green cabbage, cut in 6 wedges
salt
pepper
1/2 c. water
snipped fresh parsley
Lemon wedges

In a very large skillet, heat 1 T. olive oil and butter over medium-high heat.  Add bread, garlic, and red pepper.  Cook and stir 3-5 minutes until golden brown.  Remove croutons from skillet with slotted spoon and cool in a single layer on paper towels.

Add cabbage to skillet, overlapping wedges if needed.  Season with salt and black pepper.  Add water, bring to boiling.  Reduce heat and simmer, covered, 15 minutes or until tender.

Place cabbage on platter; drizzle with remaining olive oil.  Serve topped with croutons, parsley, and lemon wedges.

Serves 6.

Saturday, November 27, 2010

Rosemary White Bean Soup

The was the perfect use for some of the chicken stock I made the other week since the stock already had a subtle Rosemary flavor.

Source:  Adapted from The Barefoot Contessa Cookbook

1 pound dried white cannellini beans*
4 c. sliced yellow onions (3 onions)
1/4 c. olive oil
2 garlic cloves, minced
1 large branch fresh rosemary (6-7 inches)
2 quarts chicken stock
1 bay leaf
2 t. sea salt (or more, to taste)
1/2 t. freshly ground pepper

In a medium bowl, cover the beans with water by at least 1" and soak in the refrigerator for 6 hours or overnight.  Drain.

In a large stockpot over low to medium heat, saute the onions with olive oil until onions are translucent, 10-15 minutes.  Add the garlic and cook over low heat for 3 more minutes.  Add the drained white beans, rosemary, chicken stock, and bay leaf.  Cover, bring to a  boil, and simmer 30-40 minutes, until the beans are very soft.  Remove rosemary branch and bay leaf.  Pulse briefly in food processor or blender.  Return soup to the pot to reheat and add salt and pepper to taste.  Serve hot.

*Note:  substitute 4-16 oz. cans, rinsed and drained for the dried beans.

My note:  I added 2 chopped, roasted chicken breasts at the end, as well as some chopped, crispy chicken skin as a garnish - delicious!!

Sunday, November 21, 2010

Warm Spinach Salad with Fried Egg & Potatoes


I love breakfast salads - probably because it's often closer to lunch by the time I get around to eating breakfast on a weekend morning!  I have just a little bit of Swiss chard left in the garden - perfect for this recipe.  The soft-cooked egg yolk makes a yummy "sauce" for the salad.

Source:  Adapted from Everyday Food magazine

4 T. olive oil
2 baking potatoes (about 1 pound total), scrubbed and cut into 1/2" cubes
sea salt and pepper
2 T. red-wine vinegar
1 T. Dijon mustard
1 shallot, minced
2 lbs. flat-leaf spinach, torn
2 oz. Parmesan, shaved with a vegetable peeler
4 large eggs

In a large nonstick skillet, heat 2 T. oil over medium heat.  Add potatoes; season with salt and pepper.  Cook, tossing occasionally, until potatoes are tender and browned, 12-14 minutes.

Meanwhile, in a large bowl, combine remaining 2 T. oil with vinegar, mustard, and shallot; season with salt and pepper, and whisk to combine.  Add spinach and Parmesan (do not toss); set aside.

When potatoes are done cooking, immediately transfer to bowl with spinach and dressing (reserve skillet).  Toss salad until spinach is slightly wilted, and divide among four plates.

Heat skillet over medium heat, and gently crack eggs into skillet without breaking yolks; season with salt and pepper.  Cook until whites are almost set, about 1 minute.  Cover, turn off heat, and let stand until whites are just set but yolks are still soft, about 2 minutes more.  Top each salad with a fried egg, and serve immediately.

Update 12/11/10
This is excellent with sweet potatoes in place of the white potatoes!

Thursday, November 18, 2010

Chicken Stock

What's "In Season" about chicken stock?  Well, if you eat local, in-season chicken, then the stock you make from it ends up being "In Season" too!  Over the summer I roasted a fresh chicken every three weeks, stuck the carcass in a zip-lock freezer bag and put it in the freezer for making stock at a later date.  Well, the date had come!  Here's how I did it:

First, I thawed the chicken carcasses overnight in the garage (since it was cool, it was the same thing as using the refrigerator) in preparation for the big event.  First thing in the morning I placed all the carcasses, as well as drippings I had been saving from roasting the chickens all summer, in two stock pots, covered them with water and brought it to a boil.  I skimmed off the brown scum, as well as any rosemary leaves that were floating on the top, then allowed the stock to simmer all day - about 12 hours; that way I could get as many nutrients as possible from the bones.  Part way through, I removed the lids so it could cook down a bit and allow the flavor to intensify. At the end of the day, I strained the broth through a mesh strainer into another stock pot, removing the bones, meat and skin, and added sea salt until I was satisfied with the flavor.  I chilled it overnight in the refrigerator.  In the morning, I skimmed the fat off the top, then filled wide-mouth quart mason jars with 3 cups of stock each (any more than that, and you'll run the risk of cracking the jar if you plan to freeze it) and put them in the freezer.  Yum!!  It was so satisfying!  Of course, it's not possible to attempt something like this if you're not going to be home all day, but I was and thoroughly enjoyed the process.  After all the jars were safely stowed away, I even checked the freezer occasionally to make sure it was still running - I felt like I had gold in the bank and wanted to make sure it was safe!  :)  There's all kinds of good benefits to organic chicken broth, so I'm eager to take advantage of it these next months as I use it in various recipes.

Does the recipe sound too simple to be true?  Well, it isn't!  According to Maria Rodale on the Rodale.com website, anything more than an organic chicken, water and salt just messes up the flavor.  My stock included some onions left over from the chicken-roasting process and the meat had a subtle rosemary flavor, but that was it!


Update, 5/17/11

I bought a pressure canner two months ago and finally worked up the courage to try using it.  Why is everyone afraid of using a pressure canner (me included!)?  There definitely was a bit of a learning curve to it, but it was worth being able to can a bunch of chicken stock in glass jars and not worry about breakage in the freezer, or hogging up freezer space.  Also, it's much handier to open a jar of canned stock vs. remembering to plan ahead and defrost frozen stock.

For today's batch of stock, I had purchased frozen chicken backs from the farm where I buy my chickens.  It made even tastier broth than the what I made using the roasted chicken carcasses.  Yum!  And, what's even better, it's loaded with all kinds of healing properties!


Update, 11/2/15

As handy as it is to have canned stock on hand, I have reverted to simply freezing it.  Wide mouth pint jars work great and are freezer safe!


Thursday, November 11, 2010

Spring Greens with Beets & Goat Cheese


I used fresh roasted beets in place of the canned beets in this salad - yum!!

Source:  adapted from Taste of Home magazine, April/May 2009

2/3 c. pecan halves
3 T. balsamic vinegar, divided
1 T. water
1 T. sugar
1/4 c. olive oil
2 T. maple syrup
1 t. whole grain mustard
1/8 t. salt
5 oz. spring mix salad greens
1 can (14-1/2 oz.) sliced beets, drained*
1 c. crumbled goat cheese

In a large heavy skillet, cook the pecans, 1 T. vinegar and water over medium heat until nuts are toasted, about 4 min.  Sprinkle with sugar.  Cook and stir for 2-4 min. or until sugar is melted.  Spread on foil to cool.
In a small bowl, combine the oil, syrup, mustard, salt and remaining vinegar.  Refrigerate until serving.

In a large bowl, combine salad greens and dressing; toss to coat.  Divide among eight salad plates.  Top with beets, goat cheese and glazed pecans.

Yield:  8 servings

*Note:  To roast beets, preheat oven to 425 degrees.  In a 9x13" baking dish, toss 1 bunch beets (about 1 1/2 lbs.), scrubbed, with 1 T. olive oil and season with salt and pepper.  Cover dish tightly with foil; roast until tender when pierced with a knife, 45-60 min., depending on size.  When cool enough to handle, rub with a paper towel to remove skins (if desired).

Sunday, October 31, 2010

Roasted Winter Squash Seeds


Pumpkins aren't the only squash that yield tasty seeds for roasting - be sure to try butternut or acorn squash as well!

Source:  allrecipes.com

1 c. winter squash seeds
1 T. olive oil
1/2 t. salt, or to taste

Preheat oven to 275 degrees.  Line a baking sheet with parchment paper or aluminum foil, or use a non-stick baking sheet.
After removing the seeds from the squash, rinse with water, and remove any strings and bits of squash.  pat dry, and place in a small bowl.  Stir olive oil and salt into the seeds until evenly coated.  Spread out in an even layer on the prepared baking sheet.
Bake for 15 minutes, or until seeds start to pop.  (Pumpkin seeds may take a bit longer.)  Remove from oven and cool on the baking sheet before serving.

Tuesday, October 26, 2010

Mixed Bean Salad


My mother used to make a similar salad, but I think I prefer this updated version.

Source:  Everyday Food magazine, September 2010

1/2 lb. green beans, trimmed and halved crosswise
2 T. cider vinegar
3 T. olive oil
1 T. fresh oregano leaves, finely chopped
1 shallot, thinly sliced*
2 t. grainy mustard
1 can (15.5 oz.) red kidney beans, rinsed and drained
1 can (15.5 oz.) chickpeas, rinsed and drained
sea salt
pepper

In a large pot of boiling salted water, cook green beans until bright green and crisp-tender, 2-3 minutes.  Drain and rinse under cold water until cool.
In a large bowl, whisk together vinegar, olive oil, oregano, shallot and mustard.  Add green beans, kidney beans and chickpeas.  Toss well to combine.  Season with salt and pepper.

Serves 6

*Note:  I substituted 1 small red onion and a clove of minced garlic for the shallot.  (I never have shallots on hand!)

Friday, October 22, 2010

Roasted Potato Mix

This is such a simple recipe, but always gets rave reviews.  It's great for company or for just you!

Source:  Mary Beth W.

1 large russet potato, peeled and cubed
1 large sweet potato, peeled and cubed
1 c. diced onion
1/2 t. salt
1/4 t. pepper
2 T. butter
2 T. olive oil

Melt butter and olive oil in 9x13" pan.  Toss with potatoes, onion, salt and pepper.  Bake at 375 degrees for 25-30 minutes.


Tuesday, October 19, 2010

Swiss Chard with Carmelized Onions and Walnuts


I'm not 100% sure I love this recipe, but I'm determined to come up with a good sauteed Swiss chard recipe, and this is getting close.  I like the fact that it uses the chard stems in addition to the leaves.  It is an odd combination of sweet and savory, but it works for some reason.  I prefer the addition of the chick peas - it keeps the chard flavor from being too overpowering.


Source:  Adapted from chowhound.chow.com

2 T. walnuts
1 T. olive oil
1 large onion, coarsely chopped
1 bunch Swiss chard (about 1 lb. or 10 large stalks), washed
2 T. golden raisins
2 T. balsamic vinegar
1/2 t. sea salt
ground black pepper to taste

Toast the pine nuts in skillet until golden brown; set aside to cool.

In a large, deep skillet, heat oil over medium-low heat; add onions and cook until golden brown and very soft, stirring from time to time, about 10 minutes.

While onions are cooking, prepare chard:  pull leaves off stalks by folding leaf together along stalk and pull the stalk away like pulling a zipper.  Cut the stalks into 3/4" pieces; set aside.  Cut or tear leaves into 2" pieces.

Add chard stalks and raisins to onions and cook until stalks are tender, about 10-15 minutes.  Stir occasionally while stalks are cooking.  Once tender, add chard leaves and balsamic vinegar.  Toss to coat the leaves with oil, and cook for about 5 minutes or until leaves are wilted and tender.  Season with salt and pepper; transfer to serving dish and top with pine nuts.

Note: if you would like to turn this from a side dish into a main dish, add 1 15-oz. can of chickpeas (drained) that have been sauteed in olive oil and 1 clove minced garlic, and seasoned with sea salt and pepper.


Just a warning: This may not be dish you will want to serve for company, to a picky eater, or to anyone who's not committed to the virtues of Swiss chard. But it's a great recipe to introduce you to chard and its magical qualities. You may need to tweak this recipe to suit your own palate, just as I did. However, hopefully it will inspire you to continue on the chard journey, just as it did me!


Monday, October 18, 2010

Stuffed Green Peppers Casserole


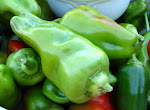
I still have a lots of  red and green cubanelle peppers in the garden, as well as some scroungy-looking tomatoes sitting on my kitchen counter, so I decided to make a double batch of this casserole for the freezer.  It also allowed me to make use of some fresh basil and oregano before the frost hits.  It's basically a recipe for stuffed peppers that I turned into a casserole so I could feature cubanelle peppers in place of the bell peppers; the cubanelles don't lend themselves to being stuffed, but they work nicely in this recipe.  Cubanelle peppers are similar to sweet Italian frying peppers and have a wonderful flavor.  Plus, for whatever reason, I have no trouble growing them, unlike Bell peppers!
For the meat, I usually use a mixture of sausage and ground beef for the best flavor.  But, since I'm trying to avoid pork these days (unless I can get it from a reputable source at a reasonable price - not very likely!), I simply used grass-fed ground beef that I get from the farmer down the road.  It was still tasty!
Organic cheese is terribly expensive, so I used just a sprinkle of a non-organic brand.

Source:  Adapted from Better Homes and Gardens New Cookbook

2 large green peppers, or the equivalent of cubanelle peppers (red or green), seeded and coarsely chopped
3/4 pound ground beef, ground pork, ground lamb, or bulk pork sausage
1/3 c. chopped onion
1 8-oz. can tomatoes, chopped or 1 c. fresh tomatoes
1/3 c. brown rice
1 T. Worcestershire sauce
1 t. fresh basil, chopped, or 1/4 t. dried basil
1 t. fresh oregano, chopped, or 1/4 t. dried oregano
1/2 c. water
1/4 t. salt
1/4 t. pepper
1/2 c. shredded cheddar cheese

In a skillet, brown meat with onion; drain fat if necessary.  Stir in undrained tomatoes, uncooked rice, Worcestershire sauce, basil, oregano, water, salt and pepper.  Bring to boiling; reduce heat.  Cover and simmer until rice is tender, approximately 45 minutes.

While the meat and rice mixture is cooking, parboil peppers in a pan of boiling water for 3 minutes; drain.

When rice is tender, stir in 1/4 c. cheese and peppers.  Place in an 8x8x2" baking dish.  Bake at 375 degrees for 5-10 minutes or until heated through.  Remove from oven and sprinkle with remaining cheese; let stand for 1-2 minutes.

Serves 4.


Saturday, October 16, 2010

Tomato and Roasted Red Pepper Salad

Here's another variation on a Tomato Bread Salad.  Again, I used some of my Rustic Italian Bread that I had in the freezer - it was the perfect texture for toasting in the oven; actually, it was the best part of the salad!!

Source:  Everyday Food, September 2010

2 c. crusty bread, torn into bite-sized pieces
5 t. olive oil, divided
sea salt
pepper
2 t. sherry vinegar
1 garlic clove, minced
2 T. coarsely chopped almonds, toasted
2 medium tomatoes, cored and cut into 1/2" wedges
2 red bell peppers, roasted and cut into 1/2" strips
1 T. fresh parsley leaves, chopped

Preheat oven to 450 degrees.

On a rimmed baking sheet, toss bread with 2 t. olive oil and season with sea salt and pepper.  Spread bread pieces in a single layer and bake until golden brown, about 7 minutes.

In a large bowl, combine 3 t. olive oil, vinegar, garlic and almonds.  Season with salt and pepper and stir to combine.  Add tomatoes, peppers, parsley and toasted bread; toss to combine.

Serves 4.

Friday, October 1, 2010

Roasted Grape Tomatoes


I made these for breakfast this morning (minus the balsamic vinegar) - yum!  With all the rain we had yesterday (5"!), I thought I had better pick all my grape tomatoes before the skins split from absorbing too much water too quickly.  A number of them had already split, but they worked well in this recipe.


2 c. grape tomatoes, washed
1-2 t. olive oil
Sea salt and freshly ground pepper, to taste
4-5 fresh basil leaves, cut in thin strips
Balsamic vinegar, optional

Preheat oven to 400 degrees.  Rub olive oil on a 9x9" baking dish.  Add tomatoes, olive oil, salt and pepper.  Toss to coat evenly.  Roast in oven for approximately 15 minutes until plump and just about to burst.  Remove from oven and drizzle with basil and balsamic vinegar (optional).