Saturday, July 10, 2010

Roasted Zucchini


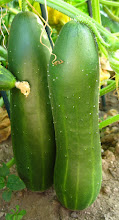
I made Roasted Zucchini for supper this evening; even my 7-year old nephew liked it! 

Simply slice zucchini lengthwise into strips, drizzle with olive oil, season with sea salt and pepper, and roast in at 425 degree oven for 10-15 minutes.  Easy!

Friday, July 9, 2010

Salmon Nicoise Salad with Dijon Vinaigrette


(FYI, Nicoise is pronounced "nee-swahs".)
This is a perfect salad for hot summer days and makes wonderful use of new potatoes and fresh green beans.  It's even better when tomatoes are in season.  My dad was kind enough to share some new potatoes from his garden with me; I happily accepted.

Source:  Adapted from Everyday Food magazine
Ingredients:
12 oz. red new potatoes
8 oz. green beans, trimmed
2 (8-oz.) skinless salmon fillets
3 hard-cooked eggs
lettuce
4 plum tomatoes, cut into quarters
1 medium red onion, thinly sliced
1/4 c. black olives

Directions:
In medium pot, bring 1/2" water to a boil; potatoes and a pinch of sea salt.  Cover and cook until tender.
Transfer potatoes to a bowl; set aside to cool.  Add green beans to pot of boiling water.  Cover; cook, stirring occasionally, until crisp-tender.  Drain in colander and rinse under cool water; set aside.
Bake salmon in 425 deg. oven until flaky, 12-15 min.  Transfer to a plate; flake with fork and let cool.
While salmon is cooking, peel and quarter eggs.  Quarter potatoes.
Arrange salmon, green beans, potatoes, eggs, tomatoes, and onion on individual beds of lettuce or Swiss chard.  Serve with vinaigrette (recipe below).

Dijon Vinaigrette:
2 T. fresh lemon juice
1 T. Dijon mustard
1/2 t. sea salt
fresh ground pepper
1/4 c. olive oil

In medium bowl, whisk lemon juice, mustard, salt and a pinch of pepper until combined.
Whisking constantly, add the olive oil in a steady stream; whisk until thickened and creamy.  Or, shake all ingredients in a small jar.

Serves 4

Thursday, July 8, 2010

Audrey's Refrigerator Pickles


I used raw apple cider vinegar in place of the white vinegars, which may have been a mistake, but they weren't bad (just not so pretty in the jar - the photo was taken before I added the vinegar mixture).  And, nothing beats the ease of refrigerator pickles! 


1 pound medium cucumbers
3 cloves garlic
1/2 t. black peppercorns
1/2 t. whole mustard seed
1 t. fresh dill weed
1 whole dried bay leaf
2/3 c. brown sugar
6-1/2 T. white distilled vinegar
6-1/2 T. white-wine vinegar
3/4 c. water

Cut cucumbers into spears or slices and place in a 1-quart mason jar.  Add the garlic, peppercorns, mustard seed, dill week, and bay leaf.
Stir together the brown sugar, vinegars, and water.  Pour the vinegar mixture over the cucumbers, add lid and shake the jar well to combine.  Cover and chill.  For fullest flavor, wait at least 24 hours before serving.  (These pickles will keep up to 3 months in the refrigerator.)

Update:  9/5/11
Note:  These are a nice option if you don't want to mess with canning pickles, but keep in mind that they won't have the flavor and texture of traditional canned pickles.

Wednesday, July 7, 2010

Squash & Pepper Saute

This is so simple, it hardly warrants a recipe!

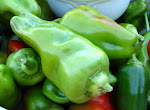
Simply saute squash, cubanelle peppers and onions in olive oil until tender.  Season with sea salt and pepper.  That's it!

Tuesday, July 6, 2010

Raspberry Sorbet with Fresh Whipped Cream


Oh my word!!!!  This is absolutely divine, not to mention BEAUTIFUL!  (I didn't even think to take a picture - I was too busy devouring it!)  And, not difficult at all!  I've been missing ice cream and Italian ice, one of my ways of celebrating summer, but more and more I can't bear to put any non-foods in my mouth.  This not only fills that longing, but totally tops anything Turkey Hill or Rita's could offer.  I used some red raspberries that I had left over in the freezer from last summer.  I had picked them at a farm not far from here last July on a gorgeous summer day.  It was such a scenic setting - it looked like it could have been a magazine spread right out of Country Living magazine.  This wonderful sorbet brought back those lovely memories.

Source:  Adapted from Martha Stewart Living magazine, July 2010

1/4 c. water
1/4 c. plus 1 T. sugar
1 12-oz. bag frozen red raspberries or 3 c. fresh raspberries, frozen
1/2 c. heavy cream

Stir together water and 1/4 c. sugar until sugar dissolves.
Pulse raspberries in a food processor until coarsely chopped.  With machine running, pour in sugar-water; pulse until mixture is smooth.  Transfer to an airtight container, and freeze until firm, about 30 min.
Whip cream and remaining 1 T. sugar until soft peaks form.
Scoop sorbet into 4 glasses and top with whipped cream.

Serves 4.

Update:  I served this to my sister last night, and she thought it was sour - maybe I'm so sugar deprived that it was sweet enough for me.  Let me know what you think!
Also, I just tried making this with frozen strawberries that I had picked last year instead of the red raspberries.  The color isn't as striking, but it's still very good.  The red raspberries, though, are my fav!


Saturday, July 3, 2010

Broccoli Salad


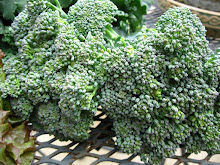
This is the classic Broccoli Salad that everyone loves.  I tried giving it a healthful tweak by using yogurt in place of the mayo.  I'm not ready to recommend that yet; there's got to be a better option, but I haven't figured it out -  I'll keep working at it!  But, I did substitute sunflower seeds for the bacon which worked nicely. 
My broccoli is continuing to produce sideshoots despite the initial rabbit onslaught, so I'm quite pleased.  :)

Source: Chambersburg BIC Church Cookbook

2 bunches broccoli, chopped (use stems also)
1/2 c. raisins*
1 med. onion, chopped*
12 slices bacon, fried and crumbled*
Dressing:
1 c. mayonnaise
1/2 c. sugar (scant)
2 T. vinegar

Mix dressing and allow to stand 2 hours.  Toss with broccoli, raisins, onion and bacon when ready to serve. 

*My variations:  try substituting craisins in place of raisins, red onion in place of onion, or sunflower seeds in place of the bacon.
Note:  The salad doesn't keep well once the dressing is added, so only add dressing to the amount of salad you plan to eat that day.
 
Update, 6/4/11
In keeping with my Local/"In Season"/Sustainable Living goals, I've been using dehydrated strawberries in place of the raisins/craisins.  
Tastes great and makes me happy!

Friday, July 2, 2010

Pecan-Crusted Salmon


Photo Credit:  Taste of Home

My first cucumber of the season was destined for this recipe!  I make this recipe a lot in the winter without the sauce, but it's even better served with the sauce in the summer when fresh cucumbers and dill are in season.

Source:  Taste of Home

2 salmon fillets (6 oz. each)
2 T. mayonnaise
1/2 c. finely chopped pecans
1/3 c. seasoned bread crumbs
2 T. grated Parmesan cheese
1 T. minced fresh parsley
1 T. butter, melted

Cucumber sauce:
1/2 c. chopped seeded peeled cucumber
1/2 c. vanilla yogurt
1/2 t. snipped fresh dill or 1/8 t. dill weed
1/8 t. garlic powder

Directions:
Place salmon skin side down in a greased 11x7x2" baking dish.  Spread 1 T. mayonnaise over each fillet.
In a small bowl, combine the pecans, bread crumbs, Parmesan cheese, parsley and butter; spoon over salmon.  Bake at 425 degrees for 10-15 minutes or until fish flakes easily with fork.
Meanwhile, in a small bowl, combine the cucumber sauce ingredients.  Serve with the salmon.
Yield:  2 servings

Wednesday, June 30, 2010

Smashed Chickpea, Basil and Radish Dip


This is delicious!! 
I always grow radishes every spring, but never know what to do with them other than eating them fresh.  Growing them always brings back fond memories of my childhood; serving radishes and green onions at the supper table was always a rite of spring. 
I know they are a healthful veggie, so I planted a second batch this year, determined to come up with a good way to use them.  I tried roasting them last year, but wasn't impressed....  This morning I tried this recipe for the first - yum, yum, yum!!  My intent was to pack it for my lunch; it quickly became my breakfast instead!  (Nothing like going to work first thing with garlic on your breath!)  I was expecting this recipe to simply be another variation on hummus, but the texture of the smashed chickpeas and crunchy radishes along with the flavor of garlic and  fresh basil and made this divinely different and colorful!

Source:  adapted from Martha Stewart Living magazine

2 cans (15 oz. each) unsalted chickpeas, drained and rinsed (reserve 1/3 c. liquid)
2 T. extra-virgin olive oil
1 t. salt
3/4 t. pepper
1/2 c. fresh basil, coarsely chopped
8 radishes, chopped
1 small garlic glove, minced
1/4 c. fresh lemon juice

Lightly mash chickpeas, oil, salt and pepper in a bowl until creamy but still chunky.  (You may want to pulse briefly in a food processor instead of mashing by hand.)  Stir in basil, radishes, garlic, and lemon juice.  Stir in reserved chickpea liquid, 1 T. at a time until dip holds together.  Refrigerate for at least 30 min.  Serve with pita chips.
Can be refrigerated for up to 3 days.

Sunday, June 27, 2010

Cucumber, Avocado and Dill Soup

I wouldn't normally include this recipe since it calls for an avocado and I'm trying to stick to 100% local as much as possible, but this is so yummy and healthful that I had to make an exception.  My friend Rose made it for me this evening; I couldn't get over how good it was!

Source: Rose C.

1 ripe avocado, peeled, pitted and chunked
1 medium cucumber, chunked
2 T. fresh lemon juice
1/2 t. sea salt
4 T. fresh dill (or less)

Simply place all the above ingredients in a blender or food processor and blend until smooth.  (No need to peel the cucumber unless you purchased it at the grocery store and it has a waxy coating; if so be sure to peel it.)
Serve with sun-dried tomatoes.

Yum!!


Friday, June 25, 2010

Cilantro Pesto

I still have a bunch of cilantro in the refrigerator that I wanted to use up (it keeps great, by the way!), so I thought I'd try making some pesto with it this evening.  Blech!!!  I had several recipes, all different, so I tried tweaking it by using a second recipe.  Blech again!  Then, I started over with a new recipe that used half cilantro and half parsley.  Better, but I don't think I'm going to waste any more time (or olive oil!) trying to perfect the recipe, especially since I have a fabulous Parsley Pesto recipe that I discovered last fall.  To stay on the up and up, I'll wait to post it until I actually make a batch this year.  :)
But hey, if you have a Cilantro Pesto recipe that you like, please let me know!

Saturday, June 19, 2010

Roast Chicken

Photo Credit: Melissa Binder

You may ask, "What's 'In Season' about chicken?"  Well, believe it or not, summer is the best time to eat fresh, pasture-raised chicken because the chickens are out and about the fields these days, eating grass and all kinds of tasty bugs.  We benefit from their diet!  (If you're interested in more details about the benefits of eating grass-fed meat, check out this link.)  I'm fortunate enough to have a farm just three miles away that sells this type of chicken.  I've arranged to purchase a fresh whole broiler chicken or two every three weeks as they "harvest" them, then plan to buy a few extra at the end of the season to stash in the freezer.  I have to admit, I did feel a bit like a chicken-killer - a freshly-dressed chicken straight from the farm looks and feels a bit too alive for me compared to buying them wrapped in plastic from a sterile grocery store that is nowhere in sight of their happy home .... (And I even grew up on a farm and have plenty of experience plucking chickens!)  I had never roasted a chicken before, but have been practicing and think I've gotten the method down now (except for the part about setting off the smoke alarm....).  I usually eat the legs/thighs right away, then freeze the breasts for another time; the breasts are so moist and tender prepared this way!  I've also been freezing the leftover carcasses for making a big pot of chicken stock at a later date.
Enjoy!! 

Source: adapted from  The Zuni Cafe Cookbook by Judy Rodgers

one small chicken, 2-3/4 to 3-1/2 pounds
4 tender sprigs of fresh thyme, marjoram, rosemary or sage, about 1/2" long
2-3 t. sea salt (3/4 t. per pound of chicken)
1 t. freshly ground black pepper

One to three days prior to cooking (at least two days for 3+ pounds chickens):
Rinse chicken and pat dry thoroughly.  Snip skin and shove an herb sprig under each breast and thigh.  Season chicken liberally all over with salt and pepper.  Twist and tuck the wing tips behind the shoulders.  Cover loosely and refrigerate. 

To roast chicken:
Preheat oven to 450 degrees.  Preheat an oven-proof 10" skillet over medium heat.  Wipe chicken dry and set it breast side up in pan.  (It should sizzle).
Place in center of oven and watch for it to start browning within 20 min.  If it doesn't, raise the temperature progressively until it does.  The skin should blister, but if the chicken begins to char, or the fat is smoking, reduce the temperature by 25 degrees.  After about 30 min., turn bird over.  Roast for another 10-20 min., depending on size, then flip back over to re crisp the breast skin, another 5-10 min.  Total oven time will be 45 min. to an hour.
Remove chicken from oven.  Lift chicken from skillet and set on a plate; place in a warm spot to rest.  (The meat will become more tender and uniformly succulent as it cools.)
Cut chicken into pieces and serve!

Note:  Salting the bird at least 24 hours in advance is the secret - it improves flavor, keeps it moist, and makes it tender. 

Update - 8/20/10
Rosemary Roast Chicken
I roasted 4 chickens last night for my "August in Tuscany" dinner.  I followed the above directions, but instead of tucking an herb sprig under the skin, I simply put 1/4 c. chopped rosemary and 1 small onion, quartered inside the cavity of each chicken just before roasting - even easier and tastier!

Another update - 10/14/12
I typically eat the wings, legs and thighs, then remove the white breast meat from the carcass and chop and freeze it for later use in recipes calling for chopped, cooked chicken.  But more recently, I've been been shredding the breast meat, then pouring the clear drippings over it to keep it moist before freezing it.  The drippings give it great flavor, and I like the texture of the shredded chicken vs. chopped.

Thursday, June 10, 2010

Trouchia

Trouchia is simply a Swiss chard frittata flavored with Parmesan cheese, a classic French egg dish.  It was featured on the Martha Stewart show today.  It sounded so simple and wonderful, I knew I had to try it.  And it was just that! 

For one serving, simply divide the ingredients by 4.

Ingredients:
8 large eggs
8 c. thinly sliced Swiss chard leaves
1 1/3 c. freshly grated Parmesan cheese
1/4 c. plus 2 T. extra-virgin olive oil
1 t. sea salt
1/4 t. cayenne pepper
freshly ground pepper

Directions:

In a large bowl, whisk together eggs.  Add chard, cheese, 1/4 c. olive oil, salt and cayenne pepper; season with black pepper, and stir to combine.

Heat 2 T. olive oil in a 10" nonstick skillet over medium heat.  Add egg mixture and reduce heat to low.  Cover and let cook until eggs are set, 10-12 min.  Holding the lid tightly to cover skillet, invert and turn trouchia onto lid.  Gently slide trouchia into pan and cook until bottom is golden, 2-3 min.

Cut into wedges and serve immediately.
Serves 4.

Monday, June 7, 2010

Double Broccoli Quinoa

This was downright yummy!  I love pesto and garlic, but never would have thought to use broccoli.  Due to the rabbit competition this year, my entire broccoli harvest for the season (including the stems!) yielded only 5 cups of broccoli - exactly what I needed for this recipe.  :)

Source:  CPRS

Ingredients:

3 c. cooked quinoa*
5 c. raw broccoli, cut into small florets and stems

3 medium garlic cloves
2/3 c. sliced or slivered almonds, toasted
1/3 c. freshly grated Parmesan cheese
2 big pinches salt
2 T. fresh lemon juice
1/4 c. olive oil
1/4 c. heavy cream

Optional toppings:  slivered basil, red chili oil**, sliced avocado, crumbled feta or goat cheese

Directions:

Cook the quinoa and set aside.

Steam broccoli just long enough to take the raw edge off.  Transfer to strainer and run under cold water.  Set aside.

To make the broccoli pesto, puree 2 c. cooked broccoli, garlic, 1/2 c. almonds, Parmesan cheese, salt and lemon juice in food processor.  Drizzle in the olive oil and cream and pulse until smooth.

Just before serving, toss quinoa and remaining broccoli with about one half of the broccoli pesto.  Taste and adjust, if needed, with more pesto, salt or lemon juice.  Place on serving platter and top with remaining almonds, a drizzle of red chili oil, and additional optional toppings.

Serves 4-6

*  To cook quinoa:  rinse 1 c. quinoa in a fine-meshed strainer (if quinoa is not pre-rinsed).  In medium saucepan, heat quinoa, 2 c. water (or broth if you like), and a few big pinches of salt until boiling.  Reduce heat and simmer until water is absorbed and quinoa fluffs up, about 15 min.  Quinoa is done when you can see the curlicue in each grain, and it is tender with a bit of pop to each bite.  Drain any extra water and set aside.

**  To make the red chili oil:  heat 1/2 c. olive oil in small saucepan for several minutes.  Turn off heat and stir in 1 1/2 t. crushed red pepper flakes.  Set aside and let cool, then store in refrigerator.  Bring to room temperature before using.


Creamed Spinach

source:  Better Homes & Gardens, November 2009

I'd like to tweak the seasonings a bit in this recipe, but for now, it was a great way to use up an abundance of fresh spinach; my spinach was soon ready to bolt, so I harvested all of it - way more than I can eat raw!  And, if you use raw cream from grass-fed cows, you'll get those nutrient benefits (minus the guilt!) as well.

20 oz. fresh spinach (large stems removed) or two 10-oz. pkg. frozen chopped spinach, thawed
1/2 c. chopped onion
2-3 cloves garlic, minced
2 T. butter
1 c. whipping cream
1/2 t. freshly ground black pepper
1/4 t. salt
1/4 t. ground nutmeg

In large saucepan of rapidly boiling salted water, cook fresh spinach 1 min.  Drain, squeeze out excess liquid.  Pat dry with paper towels (I didn't bother - didn't want to waste the towels).  Coarsely snip spinach with kitchen shears; set aside.  For frozen spinach, drain well and squeeze out liquid.

In large skillet, cook onion and garlic in hot butter 5 min.  Stir in cream, pepper, salt and nutmeg.  Bring to boiling. Cook, uncovered, until cream begins to thicken.  Add spinach.  Simmer, uncovered, 2 min. or until thickened.  Season to taste with salt & pepper.
Tuesday, June 1, 2010

Baked Kale Chips


Source:  adapted from allrecipes.com

OK, these may be a stretch for you, but it's worth a try!  It's a great low-calorie, nutritious snack and soothes the craving for something salty and crunchy.  I used sea salt, but am going to experiment with some other seasonings.  Let me know if you come up with a seasoning you like!

1 bunch kale
1 T. olive oil
1 t. seasoned salt or sea salt

Preheat oven to 350 degrees.  Line 2 non-insulated cookie sheets with parchment paper.

Carefully remove leaves from the thick stems and tear into bite-size pieces.  Wash and thoroughly dry with a salad spinner.  (Important - if there is moisture on the leaves, the kale will steam instead of crisping.)   Place in a large bowl.  Drizzle kale with olive oil and toss with hands until thoroughly coated.  Place in a single layer on cookie sheets.
Bake until the edges are brown but not burned, about 10-15 minutes.  Sprinkle with salt.

Update - since I posted this recipe, I tried another batch in my dehydrator.  I had dehydrated some kale last year and remembered it tasting better than the baked version.  My memory was correct - the kale is much better dehydrated - it looses the bitter taste and just tastes better all around.  I realize few people have the luxury of a dehydrator, but if you do, simply dehydrate at 110 degrees until crisp, then sprinkle with seasonings.
 My kale continues to produce, so I plan to keep dehydrating it so I have a supply of kale chips on hand for later use.